Soft Rot in Deck Posts: Identification, Repair or Replace Decision Guide
Safety First: This is a structural decision with real liability. If you’re unsure after reading this guide, replace the post or get a qualified pro to assess it. A sagging or compromised support can cause partial collapse.
Understanding Soft Rot: What It Is and How It Differs
Soft Rot vs. Brown Rot vs. White Rot: Critical Differences
- Soft rot: fungi digest cellulose inside the wood first, creating spongy, stringy wood that dents easily with a screwdriver. Often slow, persistent, and common in moist, ground-contact areas.
- Brown rot (“dry rot”): wood becomes brittle, brown, cubical cracking; rapid loss of strength.
- White rot: wood fibers look bleached/fibrous; slower to destroy load capacity than brown rot but still serious.
In my field inspections, soft rot almost always shows up as localized mushiness that “gives” under moderate hand pressure—especially at the base 0–6 inches above grade.
The Fungal Biology Behind Soft Rot
- Needs moisture (>20%), oxygen, and moderate temperatures.
- Spores are everywhere; control moisture, not just fungus.
Why Deck Posts Are Particularly Vulnerable
- Splash-back, wicking from soil, and trapped water at post-to-concrete interfaces.
- End grain at the base behaves like a straw, pulling water up into the post.
Common Locations: Where Soft Rot Attacks First
Ground-Contact Areas: The Primary Failure Zone
The most frequent failure is the bottom 6–12 inches of the post. Freeze–thaw + soil moisture = classic rot pocket.
Wood–Concrete Junctions
Water wicks through concrete into end grain. Posts embedded in concrete are high-risk.
Post Bases and Caps
Base brackets that trap water and uncapped post tops that absorb rain speed up decay.
Hidden Areas Behind Skirting
Poor airflow behind skirting or planters keeps posts wet longer after rain.
Early Detection: Inspection Techniques That Work
Visual Indicators: Discoloration and Surface Changes
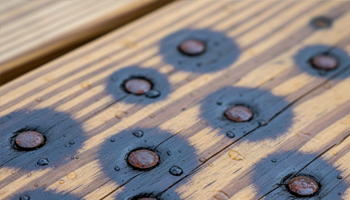
Look for dark staining, swelling at the base, fungal mycelium, or peeling finishes. Check fastener areas for rust stains—a moisture clue.
The Screwdriver Test: Proper Technique
Press a standard screwdriver straight into suspect wood with moderate hand pressure (no hammering):
- ≤ 1/8 in. dent: likely sound.
- > 1/4 in. dent: significant soft rot.
- ≥ 1/2 in. penetration: replacement is mandatory.
My standard: if I can push past 1/4″ without straining, I flag the post. Past 1/2″? I treat it like a failure in progress.
Moisture Meter Assessment
- ≤ 15%: typical target for exterior framing at rest.
- > 20%: active decay risk.
- > 28%: likely decay conditions.
Probing for Depth of Penetration
Probe on all four faces and the bottom (if accessible). Map the depth to estimate percent of cross-section affected.
Assessing Structural Integrity: The Critical Decision Point
Load-Bearing Capacity Evaluation
Identify what the post supports: beam span, tributary area, and attachments (stairs, hot tub, roof). Heavier loads reduce your margin.
Percentage of Cross-Section Affected
Strength drops nonlinearly as you lose section. A seemingly “small pocket” can erase a big chunk of capacity if it’s at the extreme fiber.
Location of Rot: Base vs. Mid-Post vs. Top
Rot at the base is more dangerous due to combined compression + shear and connection eccentricity.
Post Size and Load Considerations (4×4 vs. 6×6)
A 4×4 has little redundancy; even 20–25% loss is serious. 6×6 tolerates slightly more, but don’t get complacent.
Early in my career I learned the 25% rule the hard way: if more than 25% of a post’s cross-section is compromised, it’s not structurally sound—period. I never “epoxy my way out” of that threshold anymore.
Rot Severity Scale (1–10)
Use this to classify what you’re seeing and align to action:
1–2: Surface discoloration, ≤12% dent, moisture ≤18% → Monitor
3–4: Local softness, 1/8–1/4″ dent, moisture 18–22% → Minor repair
5–6: 1/4–3/8″ dent, localized pocket at base, moisture >20% → Repair or replace based on % section
7–8: 3/8–1/2″ dent, multiple faces, hollow-sounding base → Replace
9–10: >1/2″ penetration, crushable fibers, visible deformation → Replace immediately + shore now
I once investigated a partial collapse in Olympia (2018): post had >60% rot—obvious to a trained eye, but the owner didn’t know the signs. Three injuries. That case cemented my hard lines on replacement.
Decision Matrix: Repair vs. Replace Criteria
Repair If: Less Than 25% Cross-Section Affected
- Rot is localized, not at critical connection points.
- Moisture is controlled (you can fix the source).
- You can fully excavate and consolidate remaining fibers.
Replace If: Structural Compromise Detected
- ≥25% section loss anywhere, or any rot at the bearing interface.
- Screwdriver >1/2″ penetration.
- Observable settlement, cracking, or beam deflection.
Gray Areas: When to Get Professional Assessment
- Heavy tributary loads (roof, hot tub, long spans).
- Multiple posts with symptoms.
- Historic or specialty structures.
Insurance and Liability Considerations
If an inspection report notes rot and you ignore it, insurers may deny claims after a failure. Document findings and actions.
Severity Score “Calculator Tool” (No app needed)
Assign points; then follow the recommendation.
A. % Cross-Section Affected
0–10% = 0 pts • 10–25% = 2 pts • 25–50% = 5 pts • >50% = 8 pts
B. Screwdriver Penetration (deepest)
≤1/8″ = 0 • 1/8–1/4″ = 1 • 1/4–1/2″ = 3 • >1/2″ = 6
C. Location of Rot
Top/mid only = 0 • Base but above bracket = 2 • At base connection = 4 • Embedded in concrete = 6
D. Post Size & Load
6×6 light load = 0 • 6×6 heavy/4×4 light = 1 • 4×4 heavy = 3
E. Moisture Content (highest reading)
≤18% = 0 • 18–22% = 1 • >22% = 3
Total & Action
0–3 = Monitor quarterly
4–7 = Repair (consolidate + harden + seal + sleeve)
8–10 = Replace soon (shore first)
≥11 = Replace now (immediate shoring)
Repair Methods for Minor to Moderate Soft Rot
Excavating Rotted Material Completely
Open to sound wood; undercut pockets to expose all compromised fibers. Dry to ≤15% before consolidation.
Wood Hardener Application: Consolidation Technique
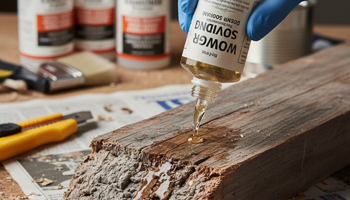
Saturate with a penetrating consolidant; multiple wet-on-wet coats until refusal. Let cure fully.
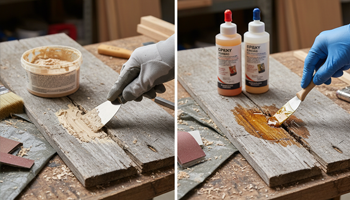
Epoxy Filler Systems for Structural Repair
Use a two-part epoxy designed for load-sharing. Rebuild geometry; predrill and reconnect hardware after full cure.
For <20% section loss, I’ve seen a good epoxy repair last 1–3 years—but only when the moisture source is fixed. Otherwise, it buys time, not safety.
Sister Post Installation for Partial Replacement
Bolt 2×6 sisters tight to both sides of the post spanning well above the decay zone. Treat this as temporary or non-critical support.
I’ve used the sister method dozens of times as a band-aid—always with a clear disclosure that it’s not a permanent fix.
Post Sleeve Retrofit Solutions
Add non-wicking sleeves/bases to keep the new repair isolated from splash and soil, maintaining airflow at the base.
Full Post Replacement: Step-by-Step Process
Supporting the Deck During Replacement
Install temporary shoring with at least two hydraulic jacks and 2×6 bearing plates. Lift to touch—not to re-level the deck.
Common mistake I see: over-jacking a beam, transferring stress to other connections. Gentle contact is the target.
Removing Old Post: Embedded vs. Bracketed
- Bracketed: Unbolt hardware; cut free and remove.
- Embedded: Cut above concrete, core-drill or chisel remaining stub without disturbing footing.
Concrete Footing Considerations
Verify footing size/depth for local loads and frost line. Replace embedded detail with an above-grade post base.
Proper Post Installation to Prevent Future Rot
- End-seal cuts with preservative.
- Use elevated, code-listed post bases to separate wood from concrete.
- Add post caps to stop top-end absorption.
- Maintain clearance for airflow and drainage.
Special Cases: Embedded Posts in Concrete
Why Concrete-Embedded Posts Rot Faster
Concrete is porous; it keeps the end grain wet. Capillary action = 24/7 moisture exposure.
Extraction Techniques Without Disturbing Footing
Core around the stub, break out, and install a surface-mounted bracket with anchors per manufacturer specs.
Above-Ground Post Bracket Conversion
Upgrade to hot-dip galvanized or stainless brackets; maintain ≥1″ standoff from slab/footing.
In the Pacific Northwest I’ve seen embedded PT posts fail in 8–18 years—far earlier than owners expect.
Preventing Future Soft Rot in Posts
Post Base Protection Systems
Use ventilated bases and non-absorptive shims; never trap water under the post.
Proper Flashing Installation
Flash ledger-to-wall and any intersections above posts to divert water.
Moisture Barriers and Drainage
Gravel around footings, downspout extensions, and grade slope away from posts.
Using Rot-Resistant Wood Species
Specify pressure-treated UC categories suitable for ground contact or choose naturally durable species where code allows.
Post Caps and Top Protection
Cap posts to stop vertical water absorption and check annually for seal failures.
Cost Analysis: Repair vs. Replace
Material Costs Comparison
- Epoxy/hardener kit: ~$60–$150 per post
- New 6×6 PT post + hardware: ~$80–$180 (region-dependent)
Labor Time and Complexity
- Minor repair: 1–2 hrs hands-on (plus cure time)
- Full replacement: 3–6 hrs with shoring and hardware
Long-Term Value Assessment
Repair can buy time if decay is <25% and moisture is solved; replacement resets the clock and improves liability posture.
When DIY Makes Sense vs. Hiring Pros
DIY for low-severity repairs and straightforward replacements; hire pros when multiple posts, heavy loads, or access issues exist.
The $200 vs. $2,000 decision is real: a small repair or timely replacement beats an emergency call and potential legal exposure.
When to Call a Structural Engineer
Signs of Widespread Structural Issues
Multiple rotted posts, beam checking, ledger separation, uneven settlement.
Multi-Post Failure Scenarios
If two or more supports are compromised, get an engineer or qualified contractor to design shoring and sequencing.
Legal and Permitting Requirements
Local code may require permits, engineered details, and inspections for structural repairs.
Temporary Shoring and Safety During Repairs
- Shore before touching hardware.
- Use proper bearing plates to spread jack loads.
- Keep bystanders away; post temporary support warnings.
- Re-check shoring after any adjustments or wind events.
ASCII Decision Flowchart (Repair vs. Replace)
Start
  │
  ├─ Moisture > 22%? ── Yes ──► Increase risk score (+3)
  │                         │
  │                         No
  │
  ├─ Screwdriver penetration > 1/2"? ── Yes ──► REPLACE NOW + SHORE
  │                                           ▲
  │                                           │
  ├─ % cross-section ≥ 25%? ─────────── Yes ──┘
  │
  ├─ Rot at base connection or embedded in concrete?
  │          │
  │          ├─ Yes → Replace soon (shore first)
  │          └─ No  → Continue
  │
  ├─ Severity Score (from calculator) ≥ 8?
  │          │
  │          ├─ Yes → Replace soon
  │          └─ No  → Repair and control moisture
  │
  └─ Schedule re-inspection (3–6 months) → Monitor
FAQs (targeting long-tails)
How much rot before a deck post needs replacement?
If ≥25% of the cross-section is compromised anywhere, replace the post. Strength drops nonlinearly; don’t gamble.
Can you repair a rotted 6×6 deck post without replacement?
Sometimes—if rot is localized, <25%, and moisture is fixed. Consolidate, fill, and consider a sister post as a temporary measure.
Deck post rotted at concrete junction—what’s the fix?
Extract the embedded stub, then convert to an above-grade bracket with a proper standoff. End-seal, cap, and ensure drainage.
Screwdriver test: how deep is bad?
At >1/4″, plan a serious repair; at ≥1/2″, treat it as a failure and replace.
Cost to replace rotted deck posts (DIY vs. professional)?
DIY materials may be under $200 per post; pro replacement commonly $600–$1,200 depending on access, shoring, and hardware.
Can you repair a deck post with epoxy filler?
Yes, for minor to moderate decay after complete excavation and consolidation. It’s not a cure-all and won’t restore a badly reduced section.
Sister post method for rotted deck support repair—when?
Use for localized base rot and light loads as a band-aid or temporary stabilization—not a permanent fix for heavy loads.
Deck post embedded in concrete rotted—how to remove?
Cut above slab, core or chisel out the stump, clean the footing, and retrofit a surface-mounted bracket.
What percentage of deck post rot is acceptable for repair?
Generally <25%, away from critical connections, with moisture under control.
When is a structural engineer needed for deck post assessment?
Heavy loads, multiple compromised posts, or any visible settlement/deflection. When in doubt, get the engineer.
How to temporarily support a deck during post replacement?
Use two hydraulic jacks minimum, with 2×6 bearing plates under the beam. Lift to contact, not to re-level.
How do I prevent rot in ground-contact deck posts?
Use the right UC-rated PT lumber, elevated brackets, proper caps, drainage, and periodic inspections.
Inspection and moisture control align with Deck Care Encyclopedia, while product selection for stabilization is covered in Wood Rot Consolidants.
Currently viewing
Soft Rot in Deck Posts
Material Longevity
Material Longevity in Coastal Urban Architecture Coastal construction confronts accelerated deterioration from salt spray, humidity…
Wood Filler for Exterior Repairs
Wood Filler vs Epoxy for Exterior Repairs: Weather Resistance Tested If you’re torn between “wood…
Green Algae on Wood Fence
Green Algae on Wood Fence Short version: Green algae on wooden fences is normal, fixable,…
Nail & Screw Staining on Wood
Nail & Screw Staining on Wood If you’re seeing blue-black halos around deck screws or…
Deck Mildew Remover
Deck Mildew Remover: Bleach vs Oxygen Cleaners If you’re hunting for the best deck mildew…
Stains on Wood Siding & Decks
How to Remove Tannin Stains from Wood Siding & Decks Short version: If you correctly…
Wood Rot Consolidants
Penetrating Epoxy vs PC Products In-Depth Review If you’re deciding between penetrating epoxies and off-the-shelf…
Black Mold on Deck
Black Mold on Deck: Safe Removal & Prevention Methods Safety First: Black mold and heavy…
Sources & Further Reading
External citations for further study and terminology alignment:


