Sand & Refinish vs Screen & Recoat — Complete Comparison Guide
If you’re weighing screen and recoat vs refinishing, you’re in the right place. This decision guide explains the difference between a quick buff & coat (screen & recoat) and a full sand & refinish, when each method makes sense, the real costs, timelines, durability, common pitfalls, and what DIYers need to know to avoid adhesion failure. I’ll also share hard-won insights from 1,000+ projects to help you protect your floors—and your budget.
Understanding the Two Refinishing Methods
What Is Screen & Recoat (Buff & Coat)
Screen & recoat is a light mechanical abrasion (usually with a 120–150 grit screen or maroon pad with an abrasive mesh) to scuff the existing finish—not the wood itself—followed by fresh polyurethane. No stain changes. Think of it as renewing the protective topcoat to restore sheen and minor clarity and to seal out future wear. It’s fast, clean, and cost-effective when the existing topcoat is intact.
What Is Full Sand & Refinish
Sand & refinish removes the finish and a thin layer of wood to reset the surface. After sanding flat and smooth, you can change stain color, repair deeper scratches, and build multiple new coats of polyurethane. It’s the reset button for deep scratches, gray/bare wood, water stains, or color changes.
The Critical Difference: Depth of Material Removal
- Screen & recoat abrades finish only. No wood removal.
- Sand & refinish removes wood + all finish, leveling defects and enabling color changes.
This difference drives everything else: eligibility, cost, downtime, and long-term return on investment.
When to Choose Screen & Recoat
Ideal Timing: Before Bare Wood Exposure
A screen & recoat works only when finish remains across the floor. If you can see bare or gray wood, you’ve waited too long—screening won’t bond uniformly and will fail. From experience, the #1 mistake I see is waiting until you see bare wood; by then, you’ve lost the cheaper option and must sand.
Surface-Level Wear and Light Scratches
If wear is cosmetic—micro-scratches, light scuffs, dull traffic lanes, minor swirl marks—a screen & recoat renews the topcoat and restores uniform sheen.
Maintaining Existing Stain Color
Because screening doesn’t remove stain, it’s perfect when you like your current color and only want fresher protection and appearance.
Can Your Floor Be Screened? Assessment Test
- Hand test: Run your hand across the floor. If you feel pronounced ridges/valleys, or your fingernail catches in deep scratches, you likely need sanding.
- Finish continuity: Look at the worst traffic lanes and around kitchen sinks and patio doors. If they’re gray or bare, sanding is required.
- Product history: If you’ve used waxy or silicone polishes (e.g., “glow” products), screening can peel unless contamination is fully removed. More on this below.
When Full Sanding Is Necessary
Deep Scratches and Gouges
When damage penetrates the finish into the stain/wood, you need a full sand to level and remove defects.
Water Damage and Staining
Dark water spots, pet stains, cupping—these typically require sanding (and sometimes board replacement) before refinishing.
Color Change Requirements
Any color change—lighter, darker, or different tone—means sanding to bare wood, then staining.
Multiple Previous Refinishes (Wood Thickness Check)
Solid floors can be sanded several times; engineered floors depend on wear layer thickness. If the veneer is too thin, you may be limited to a recoat or a very gentle refinish by a pro. Always verify wear layer before planning a full sand.
Screen & Recoat Process Step-by-Step
Deep Cleaning and Contamination Removal (Critical Step)
This step makes or breaks the job. Roughly 15% of DIY screen & recoats fail because the floor wasn’t decontaminated. It’s not just “sweep & mop.” Remove wax, oil, acrylic, silicone residue first. In my shop we use diluted TSP with a power scrubber, multiple rinses, then test for water beading. If there’s silicone residue (common from furniture sprays or “orange” polishes), new poly won’t bond—period. I’ve seen a $1,500 DIY screen & recoat start peeling in sheets after two weeks because the floor was saturated with silicone from years of “glow” products.
120–150 Grit Screening Technique
Use a buffer with a 120–150 grit screen (or maroon pad with an abrasive disk) to uniformly dull the existing finish. Edge carefully to maintain consistency along walls and transitions.
Dust Removal and Tacking
Vacuum thoroughly. Tack with solvent-appropriate cloths until the rag stays clean. Any fine dust left behind becomes visible nibs under the new coat.
Polyurethane Application (1–2 Coats)
Apply 1–2 coats of polyurethane (water- or oil-based). Follow manufacturer recoat windows. Avoid heavy film builds that can trap contaminants or telegraph scratch patterns.
Drying and Curing Timeline
Most water-based polys allow light foot traffic in 24 hours, rugs/furniture after 3–7 days, and full cure around 7–14 days. Oil-based typically takes longer. Always check the specific product.
Full Sand & Refinish Process
Furniture Removal and Room Preparation
Clear the room, protect adjacent spaces, and seal returns/doorways to manage dust.
Progressive Sanding (36–80–100–120 Grit)
Start coarse (e.g., 36–40) to flatten and remove finish, then move through 80–100–120 for a refined scratch pattern. Correct cupping/crowning during this phase.
Edging and Corner Work
Edge and detail corners/door casings to the same grit progression so the main field and edges match.
Staining Options (If Desired)
After final sanding and water-popping (if needed), apply stain for the desired color. Then lock in with a sealer and build protective coats.
Multiple Polyurethane Coats (3–4 Standard)
Most pros apply 3–4 coats with proper abrade-between steps as required by the system to ensure adhesion and build.
Cost Comparison Analysis
| Method | Typical Cost (per sq ft) | House-Level Example* |
|---|---|---|
| Screen & Recoat | $1.00–$1.50 | $800–$1,200 |
| Sand & Refinish | $3.00–$5.00 | $4,000–$6,000 |
*Based on ~800 sq ft of hardwood.
Hidden Costs and Considerations
- Contamination removal (wax/silicone stripping) can add labor or specialty chemistries.
- Repairs/board replacement (for deep damage) increases sanding scope.
- Stair treads are labor-intensive and priced separately.
- Move-out/lodging during a full refinish can add soft costs.
ROI on Preventive Screening
My pro rule of thumb: screen & recoat every 5–7 years (normal traffic) or 3–5 years (high traffic). Over 20 years, two screen & recoats + one final refinish usually cost less than three full refinishes—and your floors look better the entire time.
Time Investment Comparison
| Phase | Screen & Recoat | Sand & Refinish |
|---|---|---|
| On-site Work | 1 day (sometimes 2) | 4–7 days (size/repairs dependent) |
| Room Occupancy | Socks in 24 hrs (typical water-based) | Often 48–72 hrs minimum |
| Rugs Back Down | 3–7 days | 7–14+ days (finish dependent) |
| Furniture Replacement | 48–72 hrs light items; felt pads mandatory | 3–7 days light items; heavier pieces after full cure |
Durability and Longevity Outcomes
How Long Screen & Recoat Lasts (3–5 Years)
Expect 3–5 years in typical households; heavy traffic and pets shorten the interval. Proactive maintenance schedule extends life.
Full Refinish Lifespan (10–15 Years)
A well-executed refinish with solid maintenance can last 10–15 years before you need new work.
Factors Affecting Longevity
- Finish system (oil vs. water, 2K waterborne, traffic-rated topcoats)
- Foot traffic, pets, grit control (mats at entries)
- Cleaning products (avoid waxes/silicones; use finish-safe cleaners)
- Relative humidity control (reduce seasonal movement/cupping)
Common Mistakes and Failures
Screening Over Contaminated Floors (Adhesion Failure)
Silicone, wax, or acrylic residue causes peeling and chipping. Solution: aggressive decontamination, solvent compatibility checks, and adhesion tests.
Sanding Too Soon After Cupping
If floors cupped from moisture and you sand immediately, when they dry they may re-crown and stay uneven. Stabilize moisture first.
Aluminum Oxide Pre-Finished Floors Issue
Factory aluminum-oxide topcoats are extremely abrasion-resistant. Mechanical screening alone often doesn’t create enough “tooth.” We use a chemical etch (e.g., oxalic acid wash, pro-only) or manufacturer-approved bonding systems before topcoating.
Using Wrong Screen Grit
Too coarse leaves swirl marks that telegraph through the new coat; too fine may not create adequate bond. 120–150 is the common sweet spot.
DIY vs Professional Considerations
Equipment Requirements for Each Method
- Screen & Recoat: Buffer, 120–150 grit screens/pads, vac with fine filtration, TSP and scrubber for decontamination, tacking materials, applicators, and compatible polyurethane system.
- Sand & Refinish: Drum/belt sander, edger, buffer, detail tools, dust management, moisture gauges, stains/sealers, and pro-grade finishes.
Skill Level Assessment
- Screen & recoat is approachable for skilled DIYers who master decontamination and follow finish system instructions precisely.
- Full sanding has a steep learning curve: it’s easy to dish edges, wave the field, or cut through. Mistakes are expensive.
When Professional Expertise Is Worth It
- Contaminated floors (wax/silicone history), aluminum-oxide prefinished, engineered with thin wear layer, water damage, or any color change scenarios are best left to a pro.
Quick Decision Guide
Start
  ↓
Check for bare/gray wood anywhere?
  ├─ Yes → Full Sand & Refinish (color change optional)
  │         • Reason: no continuous finish to bond a recoat
  │         • Timeline: 4–7 days   • Cost: $3–$5/sq ft
  │
  └─ No → Are scratches/scuffs mostly in the topcoat?
           ├─ Yes → Screen & Recoat (maintain color)
           │         • Timeline: 1–2 days • Cost: $1–$1.50/sq ft
           │         • CRITICAL: deep clean & decontaminate first
           │
           └─ No → Do you want a different color or have deep gouges?
                     ├─ Yes → Full Sand & Refinish
                     └─ No → Perform deeper assessment (hand test, contamination test)
                              If finish intact → Screen & Recoat
FAQs
How much cheaper is screen and recoat vs sanding?
Typically 2–4× cheaper on a per-square-foot basis. Expect about $1.00–$1.50/sq ft for screening vs $3.00–$5.00/sq ft for sanding on most residential projects.
Can you screen and recoat engineered hardwood floors?
Yes, if the engineered floor still has a factory finish or site-applied finish intact and a sufficient wear layer. Avoid aggressive abrasion on thin veneers. For aluminum-oxide prefinished engineered floors, plan on chemical etching/bonding systems before recoating.
Screen and recoat adhesion failure causes
Top culprits: wax/silicone polish residues, improper cleaning (oily soaps), insufficient abrasion, dust left on the surface, and out-of-window recoats (finish not cured or too cured for intercoat adhesion without proper abrasion).
How to tell if floor needs refinishing or just recoating
- Bare/gray wood? → Refinish.
- Only surface scratches/dullness, finish intact? → Screen & recoat.
- Want a new color? → Refinish.
- Hand test finds deep ridges/gouges? → Refinish.
DIY screen and recoat hardwood floors equipment needed
Buffer + 120–150 grit screens, TSP and scrubber, rinses, vacuum with good filtration, tack cloths/microfiber, compatible polyurethane (follow system), applicators (roller/T-bar), and PPE. The cleaning and contamination removal step is your make-or-break.
Pro Tips from the Field
- After 1,000+ refinishing projects, the #1 money saver I’ve seen is scheduling a preventive screen & recoat before you see bare wood.
- My field rule: screen & recoat every 5–7 years (normal traffic) or 3–5 years (kids, pets, kitchens/hallways).
- I’ve witnessed a homeowner lose $1,500 on a failed recoat because years of silicone polish caused the new finish to peel in sheets—we had to full sand everything.
- On aluminum-oxide prefinished floors, I use a chemical etch (oxalic acid wash, pro-only) before bonding a new topcoat; mechanical screening alone often won’t hold.
Sanding sequences and curing times are defined under Hardwood Floor Care, and finish decisions can be compared in Polyurethane vs Oil Finish for Hardwood Floors.
Summary: Which Should You Choose?
- Choose screen & recoat if your finish is intact, your goal is to refresh sheen and protection, and you want minimal downtime and cost.
- Choose sand & refinish if you see bare wood/water damage, want a color change, or have deep scratches/gouges.
- No matter what, decontamination is king. The wrong cleaner today can cost you a full refinish tomorrow.
Currently viewing
Refinishing Hardwood Floors

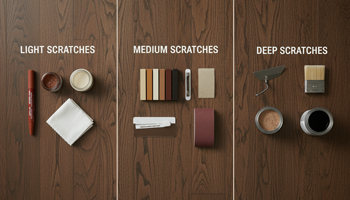
Repair Scratches in Hardwood Floors
How to Repair Scratches in Hardwood Floors: Complete Guide by Severity Level If you’re staring…
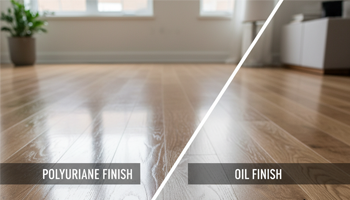
Polyurethane vs Oil Finish Floors
Durability & Maintenance Comparison If you’re comparing polyurethane vs oil finish for hardwood floors, you’re…
Best Hardwood Floor Cleaner
pH-Neutral & No-Residue Options TL;DR (buyer’s snapshot): For most homes, a pH-neutral hardwood floor cleaner…
Hardwood Floor Care Masterclass
Complete Guide by Wood Species & Finish If you want hardwood floor care by species…

