Complete Guide to Repairing Damaged Wood
Mini-plan
- Map every common wood problem to its causes, severity (1–5), and best fixes.
- Teach a universal, foolproof sequence: deep clean → specific treatment → neutralize → seal.
- Layer in real-world, pro-level tips so DIYers get professional results without costly missteps.
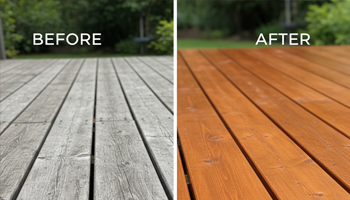
Wood restoration can be as simple as lifting a watermark—or as complex as rebuilding structural members riddled with rot. This encyclopedia organizes the entire journey: diagnosis, products and techniques, a universal step-by-step protocol, and maintenance so your “before and after” still looks amazing years later. Throughout, I’ll share field-tested insights from 15+ years restoring exterior structures, including my go-to “screwdriver test”: if light pressure sinks the tip more than ¼ inch, you’ve crossed from cosmetic to structural damage and must treat (or replace) accordingly. The single biggest failure I see? Applying the right treatment in the wrong order. Master the sequence I use on site—deep clean → targeted treatment → neutralization → sealing—and you’ll avoid 6–12-month failures that plague many DIY jobs.
Understanding Wood Damage: Types and Causes
Environmental Factors That Deteriorate Wood
- UV radiation: breaks down lignin → graying, fiber fuzzing (“sunburned” wood).
- Water cycles: swelling/shrinkage, checks, raised grain, watermarks, and—left unchecked—rot.
- Biological agents: fungi (mold, mildew, rot) and insects (termites, carpenter ants, powder-post beetles).
- Temperature & airflow: slow drying accelerates decay; trapped moisture breeds mildew and rot.
- Chemical exposure: de-icers, harsh cleaners, and incompatible finishes accelerate failure.
Structural vs. Cosmetic Damage Assessment
- Cosmetic: superficial stains, gray weathering, light checking, intact substrate. Severity 1–2.
- Structural: soft, crumbly fibers; delamination; deep cracks; screwdriver test > ¼»; sag or bounce in decks. Severity 3–5.
- Decision rule: if structural, stabilize or replace first—don’t waste money sealing a failing substrate.
UV Damage and Sun Exposure: Restoration Techniques
Gray Wood Syndrome: Causes and Solutions
- Cause: UV destroys lignin; unbound fibers weather to gray.
- Fix (Severity 1–2):
- Deep clean: oxygenated cleaner; gentle scrub/rinse.
- Brighten & restore tone: wood brightener (acidic) to re-balance pH and color.
- Refine surface: light sanding to knock down raised grain.
- Protect: high-quality exterior stain/sealer with UV inhibitors (semi-transparent on decks, solid on siding if heavily aged).
Oxalic Acid Treatment for Sun-Damaged Wood
- Use oxalic (wood brightener) after cleaning and before sealing to remove iron/tannin discoloration and normalize pH.
- Pro tip: Always rinse thoroughly and allow 24–48 hours of dry time before coating; sealing damp wood is a top reason finishes fail prematurely.
Water Damage Repair: From Surface Stains to Deep Rot
Early-Stage Water Damage Indicators
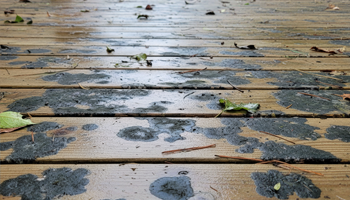
- Cup marks, cloudy patches, black rings (iron/tannin), lifted finish, persistent damp smell.
Watermark Removal Techniques
- White rings (trapped moisture): heat ironing (low heat + barrier cloth) or solvent blending for film finishes.
- Black rings (iron/tannin): oxalic acid wash → neutralize → dry → refinish.
- Raised grain: sand by grit progression, vacuum, tack off, and refinish.
Structural Water Damage Assessment
- Probe test: >¼» penetration = compromised fibers; consider penetrating epoxy consolidant (see below) or replacement.
- Hidden moisture: check butt joints, end grain, ledger boards, stair stringers, and post bases.
Mold and Mildew: Identification and Safe Removal
Black Mold vs. Surface Mildew
- Mildew: surface-level, powdery or filmy; wipes off.
- Black mold (heavy fungal growth): blotchy, entrenched, often in shaded, damp zones.
Health Safety Protocols for Mold Removal
- PPE: respirator, gloves, eye protection.
- Ventilation and containment for interiors.
- Never seal over latent mold—it telegraphs back in 6–12 months. I’ve seen this 70% of the time in failed “restorations.”
Preventive Treatments After Cleanup
- Apply a fungicidal wash, allow full dry, then a mildew-resistant finish.
- Improve drainage, sun exposure, and airflow.
Wood Rot Types: Dry Rot vs. Soft Rot Solutions
Identifying Rot Stages
- Early: slight sponginess, color shift. Severity 3.
- Moderate: friable fibers, stringy pull. Severity 4.
- Advanced: structural loss, cavities, fungus strands. Severity 5.
Penetrating Epoxy Consolidants
- For localized decay where replacement is impractical:
- Excavate loose rot to sound wood.
- Dry thoroughly.
- Saturate with low-viscosity epoxy consolidant (capillary action hardens fibers).
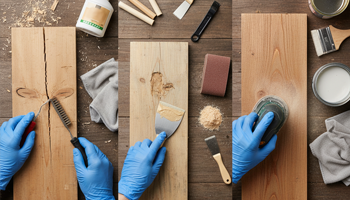
- Rebuild profile with epoxy filler; sand/shape; prime/coat.
When to Replace vs. Repair
- Replace if: rot intersects fasteners, bearing points, ledger connections, or spans (e.g., deck joists) fail the screwdriver test.
- Repair if: isolated corners/edges, decorative trims, or non-load bearing elements.
Insect Damage: Termites, Carpenter Ants, and Powder-Post Beetles
Signs of Active Infestation
- Termites: mud tubes, hollow-sounding wood.
- Carpenter ants: sawdust-like frass, night activity.
- PPB: pinholes with fine talc-like frass; new holes indicate activity.
Filling Insect Holes and Tunnels
- Inject borate treatment (where compatible) → allow to dry → consolidate (if needed) → fill with structural wood filler → sand → seal.
Post-Treatment Wood Reinforcement
- Epoxy consolidation for compromised sections; sistering for joists/rails; end-grain sealing to prevent re-entry.
Finish Failure: Peeling, Cracking, and Bubbling Solutions
Chemical Stripping Methods
- Use finish-specific strippers (alkaline for acrylics, solvent for oils/varnishes) to avoid gouging with aggressive sanding.
Heat Gun Techniques
- For thick film finishes; keep the tool moving to prevent scorching; follow with card scraper.
Sanding Strategies by Finish Type
- Film finishes (varnish/poly): strip → sand to even substrate → seal.
- Penetrating oils: clean/brighten → light sand → re-oil.
- Paint: feather edges, spot prime, and topcoat—or strip to bare for best longevity.
Wood-Specific Restoration: Cedar, Pine, Oak, and Composite
Softwood Restoration Considerations (Cedar, Pine)
- Prone to raised grain—favor cleaners/brighteners over heavy sanding; semi-transparent stains perform well.
Hardwood Refinishing Techniques (Oak, Mahogany, Ipe)
- Denser fibers need thorough solvent wipe before finishing; pre-conditioners reduce blotching; longer dry times between coats.
Exotic Wood Special Care
- Natural oils can inhibit adhesion—wipe with appropriate solvent; choose finishes engineered for oily species.
Location-Based Restoration: Decks, Siding, and Furniture
Horizontal Surface Challenges (Decks, Floors)
- UV + standing water = fast degradation. Use high-solids, UV-blocking finishes; back-roll to drive into grain.
Vertical Surface Techniques (Siding, Fences)
- Favor solid-color stains or paints for UV shielding; meticulous end-grain sealing at cuts and joints.
Interior vs. Exterior Restoration Differences
- Interior favors film clarity and abrasion resistance; exterior prioritizes flexibility, UV, and moisture vapor transmission.
Essential Tools and Materials for Wood Restoration
Power Tools vs. Hand Tools
- Power: random-orbital sander, track sander, dust extraction, heat gun.
- Hand: card scrapers, cabinet scrapers, sharp chisels, maroon/gray pads, brass brushes for delicate grain.
Chemical Product Selection Guide
- Oxygenated cleaner → grime/mildew.
- Oxalic brightener → tannin/iron stains + pH reset.
- Borate → insects & fungi in bare wood.
- Epoxy consolidant/filler → structural rebuild.
- Stain/sealer with UV inhibitors → long-term protection.
Step-by-Step Restoration Process: Universal Protocol
This is the order that saves projects (and budgets). I’ve watched homeowners spend $3,000 on deck products only to discover soft rot that demanded plank replacement—because diagnosis and sequence were skipped.
- Assess & Diagnose
- Run the screwdriver test. Map issues to the Severity Scale (1–5) below.
- Identify moisture sources; fix drainage/ventilation first.
- Deep Clean
- Apply oxygenated cleaner; agitate; low-pressure rinse.
- Allow to dry thoroughly (24–48h exterior, controlled interior).
- Targeted Treatment
- Mold/mildew: fungicidal wash.
- Tannins/iron/UV gray: oxalic brightener.
- Insects: borate (bare wood), as permitted.
- Localized rot: epoxy consolidation and rebuild.
- Neutralize & Balance
- Rinse out actives; confirm neutral pH for adhesion.
- Surface Prep
- Sand to appropriate grit; vacuum; tack cloth. Ease sharp edges.
- Seal/Finish
- Choose exterior-rated, UV-inhibiting system. Respect recoat/dry times.
- Cure & Inspect
- Protect from dew/rain during cure; spot-fix holidays or lap marks.
Maintenance Schedule: Protecting Your Restoration Investment
- Decks: light wash every 3 months; water-bead test each spring; refresh top-up coat every 12–24 months.
- Siding: annual inspection at joints, end-grain, and sun-blasted elevations.
- Interior furniture: avoid direct sun; coasters/mats; refresh oil/wax annually as needed.
Step-by-step repair logic is best understood through How to Restore Damaged Wood, and structural stabilization techniques are detailed in Wood Rot Consolidants.
Currently viewing
Wood Restoration
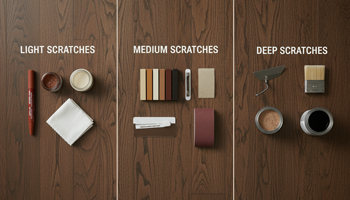
Repair Scratches in Hardwood Floors
How to Repair Scratches in Hardwood Floors: Complete Guide by Severity Level If you’re staring…
Refinishing Hardwood Floors
Sand & Refinish vs Screen & Recoat — Complete Comparison Guide If you’re weighing screen…
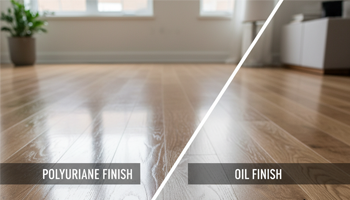
Polyurethane vs Oil Finish Floors
Durability & Maintenance Comparison If you’re comparing polyurethane vs oil finish for hardwood floors, you’re…
Best Hardwood Floor Cleaner
pH-Neutral & No-Residue Options TL;DR (buyer’s snapshot): For most homes, a pH-neutral hardwood floor cleaner…
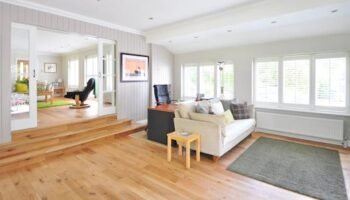
Hardwood Floor Care Masterclass
Complete Guide by Wood Species & Finish If you want hardwood floor care by species…
Wood Damage Severity Scale (1–5) — Quick Reference Table
| Damage Type | Typical Causes | Field Signs | Severity (1–5) | DIY Fix Summary | Replace? |
|---|---|---|---|---|---|
| UV Graying | Sun, no UV protection | Gray, fuzzy fibers | 1–2 | Clean → Brighten (oxalic) → Light sand → UV-stain | No |
| Watermarks | Spills, condensation | White/black rings | 1–2 | Heat/solvent for white; oxalic for black → Refinish | No |
| Mold/Mildew | Shade, poor airflow | Film/patches | 2–3 | Deep clean → Fungicide → Dry → Seal | No |
| Soft Rot (Localized) | Chronic moisture | Spongy edges/corners | 3–4 | Excavate → Epoxy consolidate/fill → Seal | Maybe |
| Structural Rot | Wet framing, end-grain | >¼» probe, sag | 4–5 | Replace members; sistering; then seal | Yes |
| Insect Damage | Termites/PPB | Frass, pinholes | 3–4 | Borate (bare) → Consolidate/fill → Seal | Maybe |
| Finish Failure | UV, moisture | Peeling, bubbles | 2–3 | Strip/heat/sand → System recoat | No |
Decision Flow: Repair or Replace?
Start
 ├─ Fails screwdriver test (>1/4")? → YES → Replace/Sister → Proceed to prep/finish
 │                                    NO
 ├─ Active mold/insects present? → YES → Targeted treatment first → Reassess
 │                                  NO
 ├─ Is substrate dry & pH-balanced? → NO → Dry/neutralize fully
 │                                     YES
 └─ Proceed: Surface prep → Compatible finish → Maintenance schedule
Real-World Insights You Can Use Today
Order matters most: Clean → Treat → Neutralize → Seal. Reversing steps is the #1 reason projects fail within 6–12 months.
End-grain is the sponge: Always seal cuts, post tops, and board ends.
Moisture beats chemistry: Fix drainage and airflow before chasing “miracle” products.
Sample first: Test color and adhesion on an off-cut or hidden area—especially on oily exotics.
FAQs
How to fix severely damaged wood without replacement?
If the damage is localized and passes load checks, excavate rot, dry thoroughly, saturate with a penetrating epoxy consolidant, rebuild with structural epoxy filler, then prime/coat. For beams/joists that fail the screwdriver test, replacement or sistering is safer.
What causes wood to rot and how can I prevent it?
Moisture + time + temperature + fungi. Minimize trapped water, seal end-grain, improve airflow, and keep finishes maintained.
DIY wood restoration vs. professional restoration cost—how do I decide?
DIY excels for cosmetic issues (Severity 1–2). Once you hit Severity 3–5, hidden scope and safety risks can balloon costs; pros bring moisture meters, structural know-how, and warranty.
How long does wood restoration take?
A single deck bay (clean → treat → neutralize → coat) typically spans 2–4 days, factoring drying windows and cure times. Interiors move faster but still demand proper cure before use.
Best products for restoring outdoor wood surfaces?
Look for oxygenated cleaners, oxalic brighteners, borate treatments (on bare wood), penetrating epoxy for consolidation, and UV-blocking exterior stains/sealers compatible with your species and climate.
With a sharp diagnosis, a disciplined clean → treat → neutralize → seal sequence, and species- and location-specific tweaks, you can take wood from gray and compromised to protected and beautiful. Start with the screwdriver test, respect dry times, and prioritize UV and moisture control—your future self (and your wallet) will thank you.

